If you’ve ever used a garment steamer regularly, you know that even the best units lose a little oomph over time—especially at the steam head. I’ve been in the garment steamer supply business for more than a decade, and one of the most common questions I get from customers (and even other small business owners) is: “How do I clean my steamer’s steam head without damaging it?” It makes sense; the steam head is where all that heated moisture shoots out to smooth out wrinkles, so buildup there kills performance. But cleaning it wrong can ruin the tiny nozzles or even the steamer itself. Today, I’m breaking down exactly how to clean your steam head safely, using the knowledge I’ve gained supplying units to homes and small dry cleaners alike. Garment Steamer

First, let’s talk about why that steam head gets dirty in the first place. Hard water is the biggest culprit. Most tap water has minerals like calcium and magnesium that don’t evaporate when heated—they get left behind in the boiler, travel through the hose, and eventually clog the tiny nozzles on the steam head. Over time, you’ll notice your steam is sputtering, coming out in weak bursts instead of a consistent stream, or even smelling a little off. Sometimes, if you use distilled water but forget to deep clean occasionally, small bits of fabric lint or dust from the air can get trapped in the nozzles too, adding to the buildup. I always tell first-time buyers of my steamers that cleaning the steam head isn’t optional—it’s key to extending the life of your unit and keeping it working like new for years.
Before we dive into the step-by-step process, there’s one important caveat: never clean a steam head that’s still hot, and never submerge the entire steam head in water unless your unit’s manual explicitly says it’s safe. Most of the steam heads we supply have a metal outer casing with precision nozzles, and submerging them can damage the internal heating elements or cause rust. I’ve seen too many customers ruin their steamers by soaking the head and then using it without drying it fully, so I always emphasize caution here.
Now, for the actual cleaning process. It’s broken into two parts: regular light cleaning (for weekly maintenance) and deep cleaning (for when you start noticing reduced steam output). Let’s start with light cleaning, since that’s the easiest way to prevent heavy buildup from forming.
For weekly light cleaning: Unplug your steamer, let it cool completely (at least 30 minutes—don’t rush this step), and remove the water tank if it’s attached. Take a clean, soft-bristled toothbrush (the kind you use for everyday teeth works fine, but a new one meant for this is better to avoid cross-contamination) and gently scrub the surface of the steam head. Focus on the nozzles—use small, circular motions to dislodge any loose lint or surface mineral deposits. Don’t press too hard; the nozzles are small and can bend or break if you scrub aggressively. After scrubbing, take a clean, lint-free microfiber cloth (I keep these handy in my supply warehouse for just this purpose) and wipe the steam head clean. If there’s still a little residue on the surface, you can dampen the cloth with a tiny bit of distilled water (again, no submerging) and wipe again. Once it’s clean, you can reattach the water tank, plug the steamer back in, and let it run on low steam for a minute to flush out any loose debris that came free during cleaning. This takes 5 minutes max, and it’s enough to keep most steam heads working well if you do it regularly.
Deep cleaning is what you’ll need every 1-3 months, depending on how often you use your steamer. If you use your steamer daily (like a dry cleaner would), you’ll want to do this monthly. If you only use it for special occasions (like refreshing wedding guest dresses or work shirts), every 3 months is fine. Here’s how to do it safely, without damaging the steam head:
-
First, prep your work area. I recommend a sink or a bowl where you can submerge the tip of the steam head (not the entire thing!) and have room to rinse it. Grab white distilled vinegar (not apple cider vinegar, which has sugar and extra residue) and a toothpick or a small, soft metal pin—nothing sharp enough to scratch the nozzles. Also, grab a pair of rubber gloves to protect your hands.
-
Unplug the steamer, let it cool, and empty any remaining water from the tank. You don’t want hot water spilling, so make sure it’s totally cool.
-
Submerge only the tip of the steam head (about the first inch, where the nozzles are) in a bowl of undiluted white vinegar. Let it soak for 15-20 minutes. The vinegar’s mild acidity will dissolve mineral buildup without corroding the metal or damaging the nozzles. I tell customers not to soak it longer than 20 minutes because even mild vinegar can start to break down small seals if left in too long—another common mistake I see.
-
After soaking, take the steam head out of the vinegar. Use the soft toothbrush to gently scrub the nozzles again, just like you did for light cleaning. If there’s a stubborn mineral deposit that won’t come loose, use the toothpick to very carefully dislodge it. Work slow—if the deposit doesn’t come out with light pressure, don’t force it, or you’ll bend the nozzle.
-
Once you’ve scrubbed all the nozzles, rinse the steam head thoroughly with warm, clean water to get rid of all the vinegar residue. Vinegar smell can transfer to fabrics if it’s left behind, so this step is non-negotiable.
-
Finally, dry the steam head completely with a lint-free cloth. You can also let it air dry for 10 minutes before putting the steamer back together. Never use the steamer if the steam head is even slightly wet—trapped moisture can cause rust inside the nozzle or damage the internal parts.
I’ve had customers ask me if there are alternatives to vinegar, and sure, there are some commercial descalers on the market. But I always recommend white vinegar because it’s cheap, easy to find, and less harsh than some commercial products. If you do use a commercial descaler, make sure it’s formulated for garment steamers, and follow the manufacturer’s instructions exactly. Never use bleach or ammonia—those are too harsh and will damage the metal of the steam head.
Now, a few pro tips I’ve picked up over the years of supplying garment steamers: First, always use distilled water if you can. Distilled water has almost no minerals, so it reduces buildup in the first place. Even if your tap water is “soft,” there are still tiny minerals that will build up over time. I tell every customer when they buy a steamer from me that switching to distilled water can cut your cleaning time in half. Second, if you notice your steam is sputtering even after cleaning, you can run a full cycle with just water and a little vinegar (1 part vinegar to 4 parts water) through the steamer, not just soak the head. This flushes out any buildup that’s further back in the hose or boiler, which can also affect steam output. Third, never use compressed air to clean the nozzles. Compressed air is too strong and can bend the tiny nozzles or push debris further into the steamer, causing more problems later.
I also want to address a common myth: some people think that cleaning the steam head will void their warranty. That’s not true—all the steamers I supply come with a warranty that covers manufacturing defects, not damage from improper use. But following these cleaning steps won’t void your warranty; in fact, doing regular cleaning will keep your steamer working, so you won’t have to use the warranty for a simple issue like clogged nozzles.
After cleaning, it’s a good idea to test the steamer on an old fabric scrap (like an old cotton t-shirt) to make sure the steam is consistent before using it on a good garment. That way, if any debris is still left in the nozzles, it won’t get on your nice clothes.
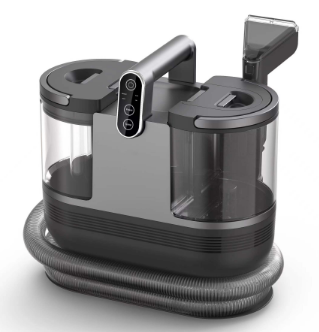
As someone who’s spent years in the garment steamer industry, I know how important it is for your steamer to work when you need it. Whether you’re a small boutique owner refreshing inventory, a busy parent keeping school clothes wrinkle-free, or someone who just hates ironing, a clean steam head makes all the difference. If you’re in the market for a new garment steamer or need reliable, high-quality replacement parts, I’d be happy to help. Feel free to reach out to discuss your needs and find the right solution for you.
Carpet and Upholstery Steam Cleaner References:
Garment Steamer Maintenance Guide, Textile Care Association, 2022
Household Appliance Descal Best Practices, Home Improvement Research Institute, 2021
Professional Dry Cleaner Equipment Care Manual, International Fabricare Institute, 2020
Ningbo MLE Electrical Appliance Co., Ltd.
Ningbo MLE Electrical Appliance Co., Ltd. is one of the most reliable garment steamer manufacturers and suppliers in China, also supports customized service. Welcome to buy advanced garment steamer made in China here and get pricelist from our factory. Quality products and reasonable price are available.
Address: 921 Room, Jinsejiangnan Building, Zhonghe Street, Yinzhou District, Ningbo, Zhejiang, China.
E-mail: Eileen@nbmle.cn
WebSite: https://www.cleaningappliance.com/
